


Ever wondered how easy/difficult it is to build our own CLI? If Yes, 😃 you are on the right place 🙂
May be a CLI to perform API calls to GitHub like below?
$ git-apis --help
Usage: git-apis [OPTIONS] COMMAND [ARGS]...

  A CLI wrapper for the GitHub APIs.

Options:
  --help  Show this message and exit.

Commands:
  repos  Get Repo related details - Languages/Contributors for a given repo...
  users  Get User details
Let's get our hands dirty for the next few mins to build our own CLI.💻⏰
What should you have: Basic programming skills
What are we using: Click, which is Command Line Interface Creation Kit in Python.
For more details : Click Documentation
Bonus Tip: You can publish your cli to pypi.org so that it is accessible to everyone through $ pip install cli-you-created
Let's get started
1 . Lets run a simple python program. To check if env is all set.
#!/usr/bin/env python

def mycli():
    print("Env is all set!!!!")
    pass

if __name__ == '__main__':
    mycli()
$python3 my-cli.py
Env is all set!!!!
I have temporarily added alias, for better experience before we upload it to pypi.org. So it looks something like below
$ alias my-cli="python3 my-cli.py"
$ my-cli
Env is all set!!!!
2 . Install click and understand different decorators we will be using
Installation : pip install click
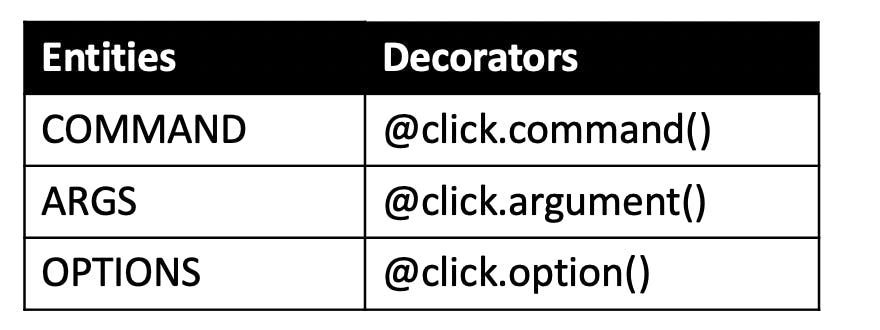
Let's understand different entities in a command and their respective decorators in Click.
COMMAND [ARGS] [OPTIONS]
3 . Click in Action
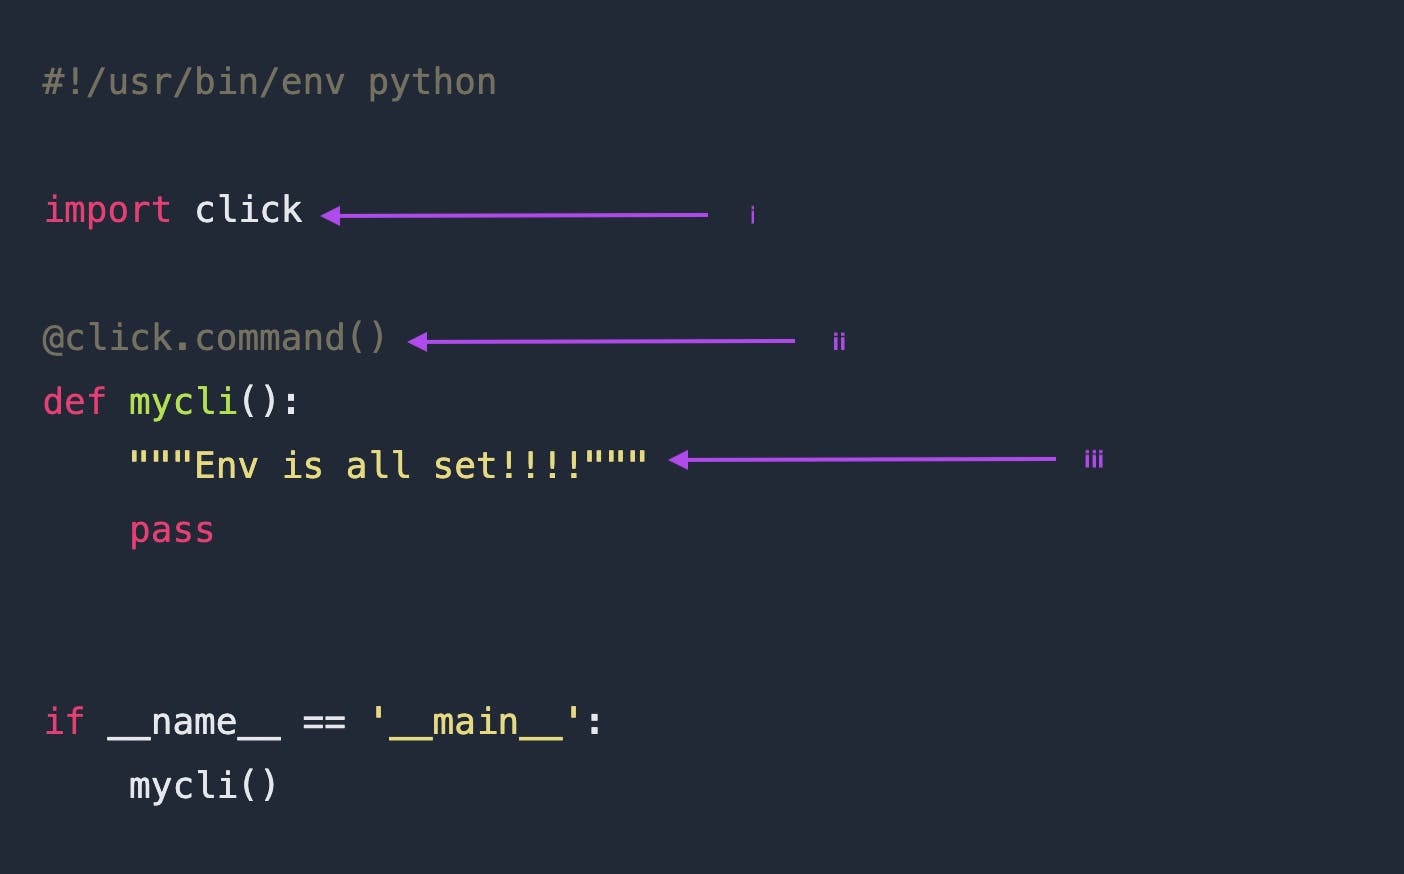
Let's update our code with
i. import click.
ii. Add a command decorator to our function.
iii.Let's also replace print with click docstrings - Which will be the help text for our cli
Link to code i will be using for this demo: GitHub Repo
Now let's have a look at output 🤠
$ my-cli --help
Usage: my-cli.py [OPTIONS]

  Env is all set!!!!

Options:
  --help  Show this message and exit.
Yay !! 🥳🥳 You should be able to see the help message while trying to run cli. Very easy, right!? 😍
4. Command Arguments
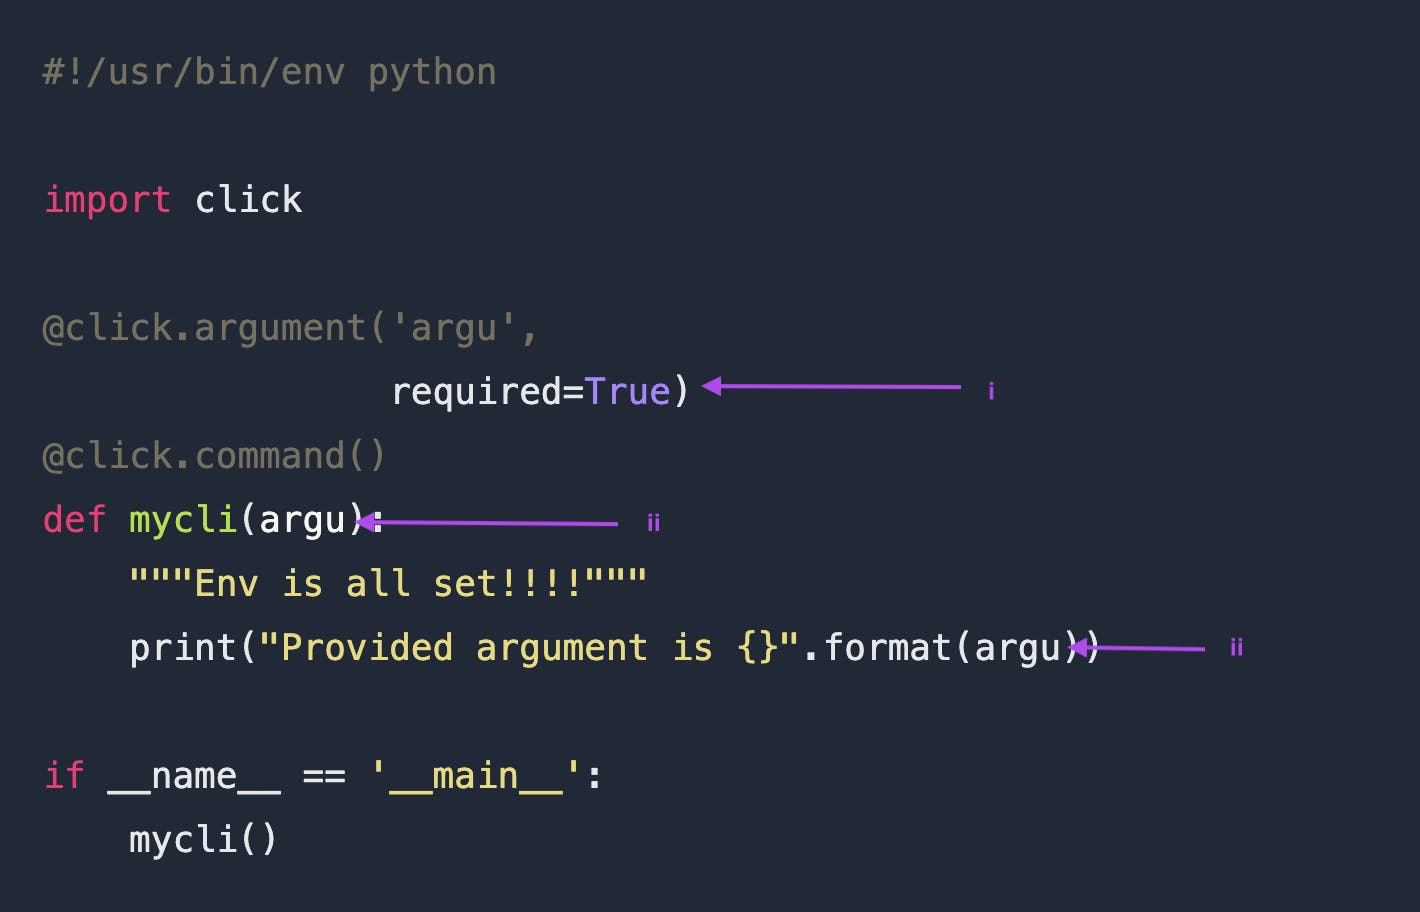
i. Now let's make sure argument is a required entity.
ii. Pass argument to command.
iii. Process the argument
 Now when we try to run cli, it expects a argument as we set
 required=True
$ my-cli
Usage: my-cli.py [OPTIONS] ARGU
Try 'my-cli.py --help' for help.

Error: Missing argument 'ARGU'.
Let's provide an argument now
$ my-cli hello
Provided argument is hello
5. Command Options
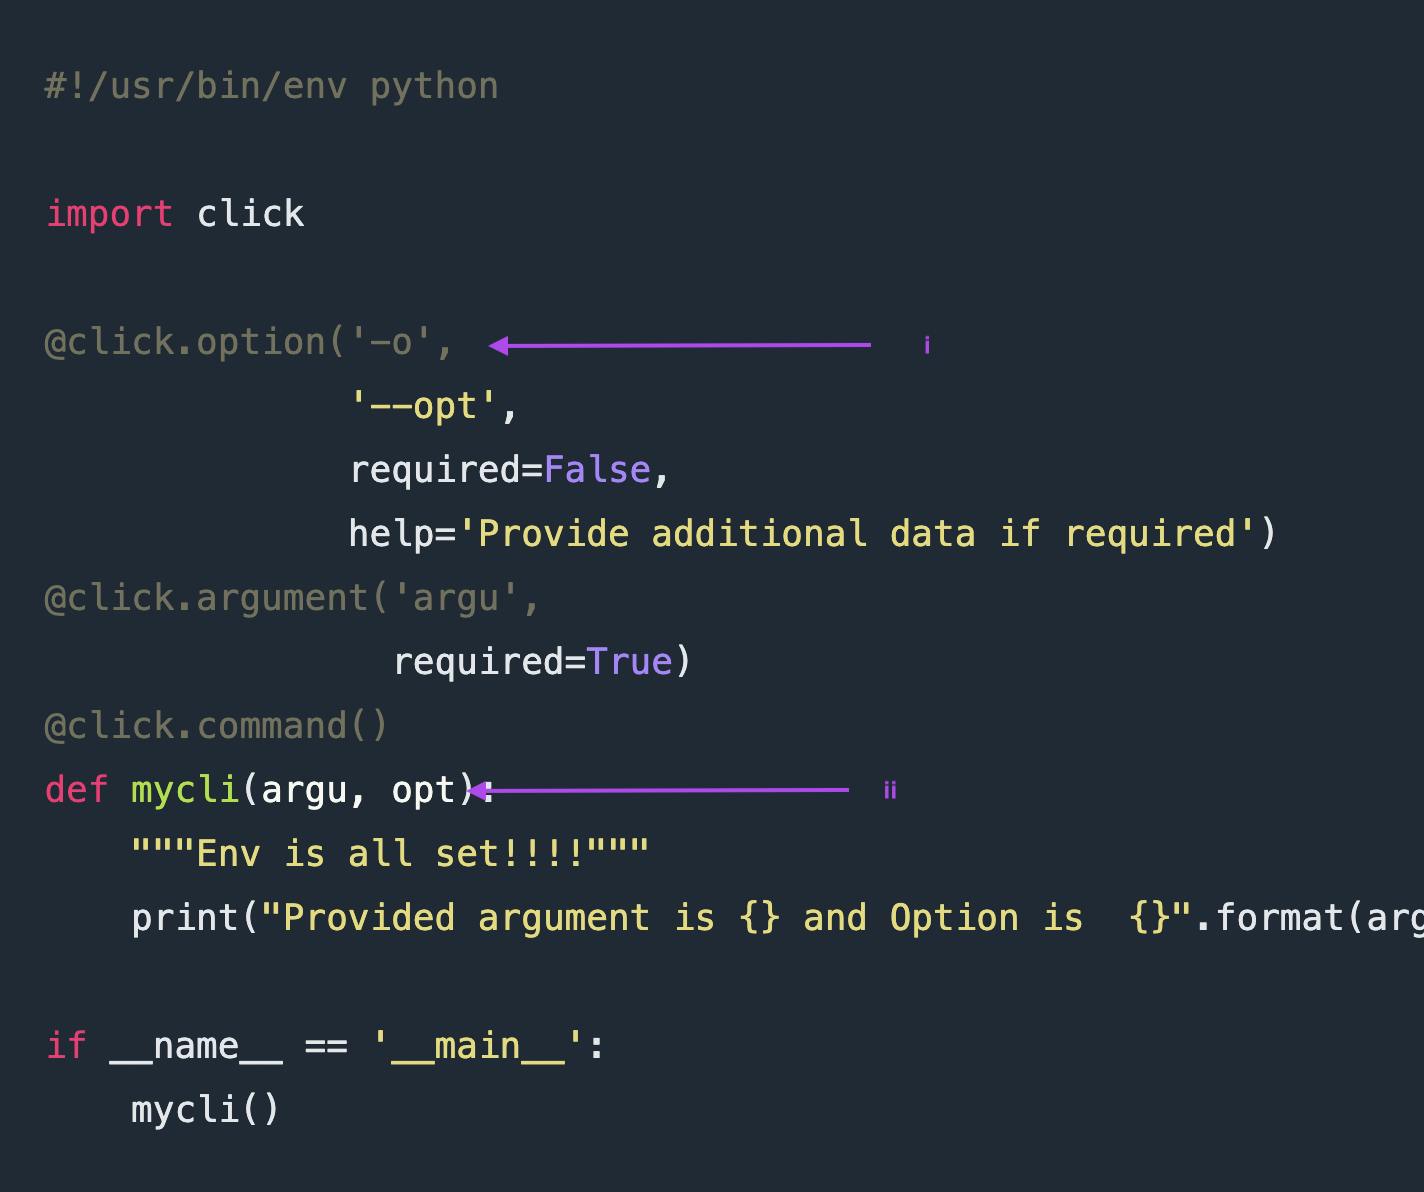
i. Add option decorator.
ii. Pass the option information to command for further processing.
Now let's see how --help looks like and notice the options section populated with data provided.
$ my-cli --help
Usage: my-cli.py [OPTIONS] ARGU

  Env is all set!!!!

Options:
  -o, --opt TEXT  Provide additional data if required
  --help          Show this message and exit.
Let's finally run our cli with both arguments and options
$ my-cli hello
Provided argument is hello and Option is  None
$ my-cli hello -o world
Provided argument is hello and Option is  world
$my-cli hello --opt world
Provided argument is hello and Option is  world
We are all set with our basic CLI. ✅💻
Advanced:
In real time scenarios we may have one or more commands to be grouped so that we can perform something like below:
$my-cli start [OPTIONS] [ARGS]
$my-cli stop [OPTIONS] [ARGS]
So in above example the start and stop functions get command decorator @click.command() and our main function gets @click.group() decorator.
Refer to Git-apis-cli for further hands-on. In the interest of time, I have only covered basics to get started here.
Hope, I was able to get your first CLI running. 🥳
If yes, share it in your network and would love to hear if this helped. 😊
⌛️ Bonus tip before we meet in the next blog - I have used the tutorial here by Deepak Kumar to create pip package, which makes it much easier to use as mentioned in the README here.
-- LakshmiSowmya.